 |
|||||||||||||||||||||||||||||||||||||
|
Report on Vandyke Brown Tests It had been 6 or 8 months since I had first tried my hand at Vandyke brown printing. I looked at the information in Wynn White’s article Vandyke Brown Notes again to refresh my memory. I still had a bottle of sensitizer I had mixed up last year--it had some sediment in the bottom, which I filtered out. I’ve read posts on the Alt-Photo-Process mail list that indicate that the sensitizer loses contrast over time, though I really couldn’t tell. I mixed a new batch of sensitizer, then used it again about a month after I mixed it and experienced black spots on my prints. They went away after I filtered the mixture. In future I will make it a habit to filter the sensitizer every time I use it. I printed on Crane’s Kid Finish White, 8.5x11 inches. This paper works well for Vandyke printing, though it is very fragile when wet and there are other papers with a smoother surface.
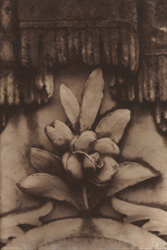
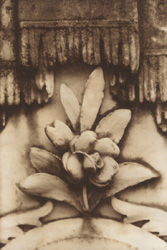
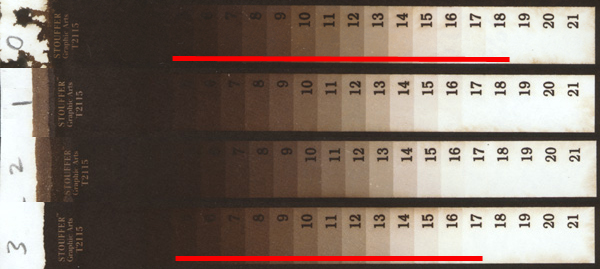
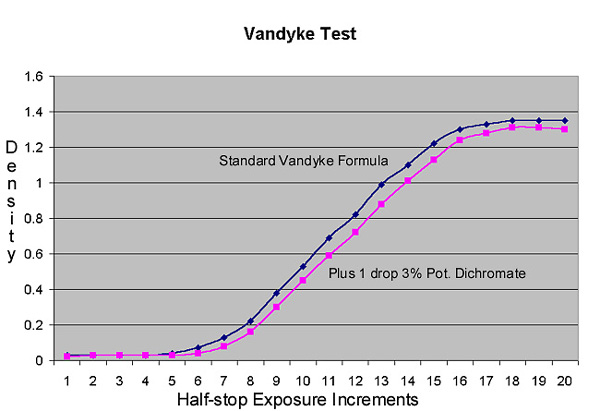
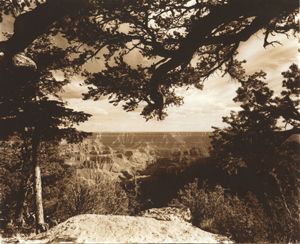
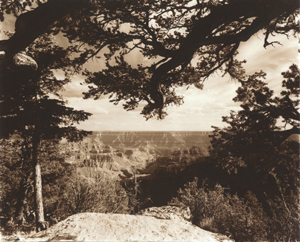
All three of these images were printed on Crane’s Kid Finish White with two coats of sensitizer. For the image on the right the first coat had 1 drop of 3% potassium dichromate added--exposed to morning sun for 30 minutes. The image on the left, which has no additives to the VDB solution, was exposed to afternoon sun for 30 minutes. The image in the middle has 1 drop of 2% potassium dichromate added to the first coat, and was exposed for 13 minutes in a UV printer. You can click on these images to enlarge them. I believe the one in the middle is the most satisfying, though I’d still like to print one somewhere in-between the one in the middle and the one on the right. There has been some discussion on the Alt-Photo-Process list that dichromate doesn’t do anything except require increased exposure to get the same scale. So it is possible that I could get the same result as on the right by simply reducing the exposure on left hand print. To test contrast I made some tests with Stouffer step wedges. Below are 4 test strips, all given a 20 minute exposure under a UV light source. At the top is straight VDB solution with no additives. Below that one drop of 1% potassium dichromate solution has been added to the first coat, then one drop of 2%, then one drop of 3%. The 3% test strip shows a clear contraction of just under one-half stop. This reflects my experience--3% dichromate seems to clear the whites very nicely. Of course, a half-stop contraction of scale isn’t enough to enable one to print a soft negative in VDB, but can be useful in some cases. I will do some further tests with a 5% dichromate solution.
(After performing these tests, I began reading Dick Stevens’ book Making Kallitypes, wherein he performs a similar test by adding various quantities of sodium dichromate to Kallitype IB developer with similar results--he was able to obtain 1/2 to 1-1/2 stop increase in contrast in his type I Kallitypes.) But a much more dramatic increase in contrast of Vandyke prints can be obtained by substituting 3 to 6 grams of ferric citrate for an equivalent amount of the ferric ammonium citrate in the VDB formula (following a suggestion made by Liam Lawless). The ferric citrate does not dissolve well, but heating the water helps, as does increasing the quantity of tartaric acid (up to 4 grams, according to Lawless). This formula gives a full stop or more increase in contrast. I use it for the first coat, then use the standard VDB formula for the second, but even more contrast can be obtained by using the ferric citrate variant for both coats. Similarly, incremental contrast adjustments can be made by combining the two solutions in various ratios. The use of ferric citrate to adjust contrast is mentioned fleetingly on page 205 of Dick Stevens’ book Making Kallitypes, where he describes James Thompson’s brown print process: “If more contrast is desired...ferric citrate should be added to the sensitizing solution 1 grain at a time.” I devised a possibly easier way to add the ferric citrate. I took 3 grams of ferric citrate and added it to 25ml of distilled water at 140° F and stirred for 5 minutes. I then added
0.5 grams of tartaric acid followed by more hot water to 33 milliliters. Despite the fact that I continued to stir for another 5 minutes, a great deal of the ferric citrate did not
dissolve. I strained the liquid and placed it in a brown glass bottle, and have been adding one to three drops of the solution to the VDB sensitizer before coating. This seems to
work as well as the method described in the previous paragraph.
Selenium toning seems to eliminate the yellow cast untoned prints have, giving them a nice chocolate color, and it very slightly reduces the entire print and clears the whites. I only used 2 milliliters of Kodak Selenium Toner in a liter of water.
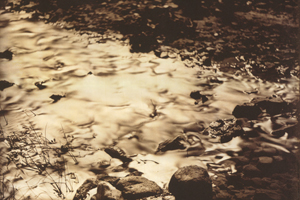
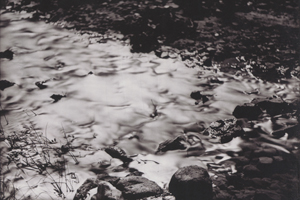
Gold toning gives the print a very faint purple cast at first, and with longer toning produces a neutral grey tone. Gold toner tones every portion of the image, and does not have any reducing action. My feeling is that this image needs to be made with a bit less exposure, so that some areas of pure white remain in the water, as in the image below.
The print above was toned for 1 minute in selenium, then for 2 minutes in gold. This is from an 8x10 pyro negative that required a 35 minute exposure under UV light. Judging Exposure: After working with the VDB process for a couple of months, I’ve realized that all I really need to check for is detail in the high values. Several sources have said that it is better to overexpose than to underexpose, since you can always reduce, but in practice it seems to me that it is possible to deal with slight overexposure, but not gross overexposure. Clearing the high values: I have learned that if I get a little too much density in the high values of a print, I can simply leave it in the hypo solution for 5 to 15 minutes. Then I can follow that by 2 to 5 minutes in a very dilute solution of Kodak Selenium Toner (2 milliliters in one liter of water), which reduces the high values even further. However, the selenium toner will also begin reducing the low values, which is often not desired. Printing in humid conditions: One Saturday it was raining outside when I decided to print VDB. The relative humidity in my garage was approaching 100%. I was astonished at the very brief exposure times that were required. I’d like to repeat this a few more times before I pronounce it a certainty, but I’ve never made such brief exposures before. It seems to me that the humidity also gave me a longer scale, or less contrast. Print Reduction: Bleaching works best when done before the hypo bath. I used 3 milliliters of iodine reducer in 1000 ml. of distilled water. The mixture turned every unexposed portion of the print purple, but the purple color was quickly neutralized in the 5% hypo bath. The iodine reducer gave very clean whites. Further Information: |
|||||||||||||||||||||||||||||||||||||
