|
The Fundamentals of Temperaprint
by Peter Fredrick
 In the beginning there was the egg. In the beginning there was the egg.
Eggs have been used as a binding medium for pigment paint since primitive times. The Temperaprint process utilises a form of light sensitive paint and has some similarities to gum bi-chromate printmaking.
The process is applied to any suitable surface in the manner of Egg-Tempera-Painting. The image is built up layer by layer, often several layers going to make a single coat, and a number of coats to make a final print.
Outline of the process
- Have all the tools and materials you need at hand
- Prepare the egg. Mix using a kitchen blender
- Make a saturated solution of ammonium dichromate (SAT/SOL) with pure water, not tap
- Make a Standard Emulsion Mix (STEM) --two parts of blended egg to one part SAT/SOL.
- Add colour to the STEM, approximately (depending on pigment) one part to eight (1+8).
- Coat the Coloured Temperaprint Emulsion onto either laminated polypropylene Yupo; polyester Melamex or a heavily sized Watercolour paper. Use a plastic foam roller to coat thin/smooth.
- Dry the coated surface with a hairdryer
- Register the coated surface to the negative to be printed
- Load the registered-coated surface plus negative into a contact frame
- Expose to a light source rich in ultraviolet radiation for one to three minutes in direct sunlight
- Develop/wash in a flat-bottomed tray containing water with a dash of dish washing up liquid added. Use a plastic foam roller to develop the image--roll gently.
- Clear in 5% sodium metabisulphate or, better still, 1% sulphuric acid
- Final wash
- Dry
- Multiple print until the desired colour/ tone is achieved
 My personal aesthetic is based on the vision and writings of old Omar Khayyam
and runs throughout my work as a central theme. My personal aesthetic is based on the vision and writings of old Omar Khayyam
and runs throughout my work as a central theme.
"For in and out, above about below.
O 'Tis nothing but a magic shadow show.
Played in a box whose candle is the sun.
Round which we phantom figures come and go"
My phantoms are the elements of my personal world around me that I seem to perceive in a mystical way.
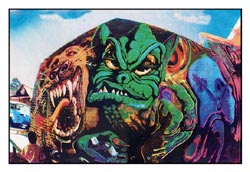
- WonderWall graffiti marks on walls
- Replicant {statues, dummies in windows etc}
- Passions of the night churchyards and cemeteries
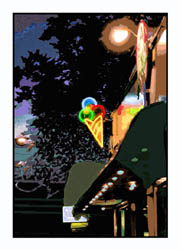
- IsCream ice cream signs
- Essence digital manipulations
- Classic moody vintage images that are popular
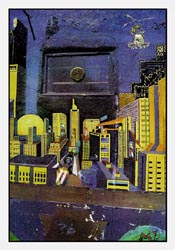
- Metropolis city centres
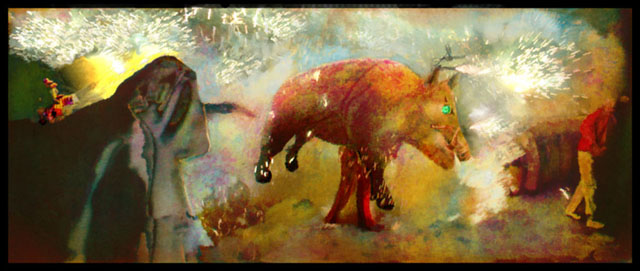
- The Catalonian Connection correfoc gegantes timbalers
The footprint is of more interest to me than the foot.
BASIC CONSIDERATIONS
 Let’s make a Temperaprint. First, what has to be understood from the start
is that each stage in the process is precise. All work must be undertaken carefully and in a slow unhurried manner. Quantities must be measured accurately--small variations can escalate into major imaging problems.
This is a process that doesn’t favour serendipity. Having said that, once in control it is a fast powerful method of imaging. Egg is very adhesive with
the correct preparation--almost any surface can be printed on: paper, glass, ceramic, fabric, wood, rock, etc. It is an open ended versatile process. Let’s make a Temperaprint. First, what has to be understood from the start
is that each stage in the process is precise. All work must be undertaken carefully and in a slow unhurried manner. Quantities must be measured accurately--small variations can escalate into major imaging problems.
This is a process that doesn’t favour serendipity. Having said that, once in control it is a fast powerful method of imaging. Egg is very adhesive with
the correct preparation--almost any surface can be printed on: paper, glass, ceramic, fabric, wood, rock, etc. It is an open ended versatile process.
Firstly, I scan a 35mm colour negative into my computer and create an
electronic file. This master file is then cleaned up; all the image debris is smoothed out or removed. The overall tonal and colour balance is brought to neutral. I try to make
the image on the screen as perfect as I can from a reproductive point of view. Not an easy task. Finally, I enhance the image from a creative perspective to fit my personal aesthetic.
This master file is then burnt to disk. A duplicate image is made which I colour separately in PhotoShop to give me four CMYK monochrome positive channels. I apply my PAC (see Dan Burkholder’s Making Digital Negatives for Contact Printing. Thanks Dan!) and make four inkjet
negatives with register marks. I now use a superb new material from Kentmere called K Translucent II. This film gives super dense blacks said to be Dmax 4. Armed with these negatives, I am now ready to egg-tempera-print.
You may ask why I use CMYK separation rather than the more normal CMY. Well, in my image making I need to have separate control over the shadow detail. Fine adjustment is important to me.
However, this is personal taste not essential technique.
Preparing the Egg
Always use the freshest egg possible. Store-bought eggs work fine providing they are fresh. A fresh egg will have a strong sac and will form a firm mound. Over time, the sac weakens, as does
the binding strength of its contents. The type of egg used can also affect binding strength. Fresh eggs from free-range chickens will produce a stronger binder because of the rich, viscous yolks.
I find that three to four eggs give enough emulsion for a three to four hour session of printmaking. I tend to work a session of this length of time firstly because I can’t work a full day any more (anno
domini), and secondly the eggs go off chemically after this time and will need to be thrown away and fresh made up.
Mixing. Crack the three or four eggs into a kitchen blender, whisk for thirty seconds and you get
instant consistent pure egg emulsion every time! What can be simpler than that?
To make a Saturated Solution of Ammonium dichromate
 A saturated solution is where water reaches a point at which it is
unable absorb any more of a dissolvable chemical, and becomes saturated. Once this condition is reached any further additions of the chemical will not be absorbed and it will just sit on the
bottom of its container until further water is added. A saturated solution will always be the same, and is therefore known and constant. A saturated solution is where water reaches a point at which it is
unable absorb any more of a dissolvable chemical, and becomes saturated. Once this condition is reached any further additions of the chemical will not be absorbed and it will just sit on the
bottom of its container until further water is added. A saturated solution will always be the same, and is therefore known and constant.
You can use bottled, de-ionised, or still spa water for the purpose. The best water to use is distilled water. Never use tap water! To this water is added ammonium dichromate, which is the
actual sensitizer. It is these chemicals when mixed with a colloid such as egg. that have the effect of hardening the colloid in direct proportion to the amount of light that it receives, rendering it
insoluble, or tanning it, as it is sometimes described. Making a saturated solution is a very easy task. Work cleanly and keep the chemistry contained to an area that can be cleaned, and has
running water, such as a sink, and wear protective/disposable gloves. Take a glass container with a sealable lid and add 100ml of pure water. To this add two heaped spoons of Ammonium
Dichromate crystals and close the container. You will notice that the water turns yellow and that the crystals are sitting on the bottom, now agitate the container for thirty seconds. To check your
progress let the crystals settle. The fine dust like particles will have dissolved away first, so what you should see when it clears is just the larger lump's looking rather like sugar crystals in water.
Once most of the crystals have dissolved, add another heaped spoon and continue to agitate, checking periodically on your progress. When you notice that the fine particles remain, as slurry on
the bottom, and no amount of agitation will get them to dissolve, the solution is now saturated. Keeping the glass container sealed, wash under running water to remove any sensitizer that may
have escaped or is trapped in the threads of the lid and clean up the area. In this saturated state the solution will last for months provided it is kept from the light in a dark brown glass container. To
maintain the saturated solution, add more of the distilled water or Ammonium Dichromate, always ensuring that a fine slurry of crystals is present on the bottom.
Issues and Concerns
All chemistry can be considered potentially dangerous and therefore should be treated with respect.
1. You should not inhale the dust
2. Use protective or disposable gloves when mixing the sensitizer
3. Remove any splashes on your skin immediately
STEM
STEM stands for Standard Emulsion Mix. It is a mixture primarily of the whole egg with Ammonium Dichromate, which is our sensitizer. Each part needs to be prepared separately and then brought together in the right
proportions. It is at this stage of the process that the STEM can be adjusted for a particular working characteristic. Though not complicated in any way, it should be born in mind that it is
important that the measuring is done accurately for results to be consistent. To complete the STEM, measure out a 100ml of blended liquid egg into a sealable container. Now add 50ml of saturated
sensitizer solution. Seal the container and agitate vigorously for ten to twenty seconds to ensure that the two liquids are fully mixed. When you open the jar you will see a frothed up orange liquid
.Do not worry about this, the froth soon settles down. This is the basic STEM mix and is transferred into a measuring jug.
Adding pigment to the emulsion
 I use for the moment acrylic paint in the Egg-Tempera-Print process to
provide the colour; in particular, Liquitex concentrated artist colour. Other acrylics may or may not work better. Watercolour and pure ground pigment
also work very well. It is just that I like the acrylic look in the print--again, personal taste not essential technique. I use for the moment acrylic paint in the Egg-Tempera-Print process to
provide the colour; in particular, Liquitex concentrated artist colour. Other acrylics may or may not work better. Watercolour and pure ground pigment
also work very well. It is just that I like the acrylic look in the print--again, personal taste not essential technique.
Tools Materials for mixing the colour
- STEM solution
- Bottle/jar of acrylic paint [Liquitex]
- 5ml Measuring Spoon, preferably stainless steel, or a syringe without needle
- Small palette knife
- 1/2 inch brush
- Large oval white dinner plate
Take the 5ml spoon and squeeze out or pour enough paint to make a spoon full of paint. If necessary use the palette knife to level accurately. An alternative method is to use a 5ml plastic syringe.
Place the level spoonful of paint in the centre of the oval dinner plate. Now use the brush to move the paint off the spoon onto the plate. Add 5 ml of the STEM solution and begin to work the paint
and STEM solution into each other until they are thoroughly uniform and mixed. Now add a further 5ml and again work them together. The important issue is to ensure as even dispersion as possible,
and not to end up with clumps of pure paint sitting on the plate. Initially this means working the paint from its original stiff consistency to a liquid through a series of additions. As this progresses
it will get easier to mix together as the mix becomes more and more fluid. When you have made up enough temperaprint emulsion, pour it into a small jug or beaker, then clean the plate ready for coating.
Pigment to emulsion ratio by volume
There can be few hard and fast rules as to the correct amount of pigment in the emulsion, as the variables in the supply are just too vast. Experience and getting to know your materials is the only
sure way of knowing absolutely.
It is important to remember that there are two ways to change colour saturation or tonal density.
One is to increase or decrease the amount of pigment in the mix. Or secondly to print a number of identical coats one on top of the other in a multiple layer approach. In practice you will tend to use
a mixture of both these methods. However it is noticeable that once the ratio drops below five parts STEM solution to one part paint the working characteristics start to radically change. Coats
will become heavy, exposure time will be significantly increased and the contrast will become excessive until eventually you are unable to gain a good even coat or exposure. The following
provides a general guide to the limitations of how much colorant it is possible to load into a coat: -
Use one level spoonful of acrylic paint as a standard unit of measure i.e. 5ml: -
 |
Chromatically Spoons of Emulsion (STEM)
- Strong [maximum] Four
- Medium [normal] Eight
- Thin Ten
- Glaze Twenty
Recommended CYMK ratios: K1+6, Y1+7 M1+8, C 1+15.
It is very important to measure these quantities carefully, and consistently, What has to be
understood is that this coloured Temperaprint emulsion is not just some messy paint, but in fact a precise photosensitive emulsion. The amount of pigment to emulsion will vary from colour to colour.
Choice of substrate
The relationship between the emulsion or paint and the surface quality of the substrate onto which it will be laid is extremely complex. They both need to be matched very carefully. Rather like a
hand snugly fitting into a glove.
As previously stated, because the egg is naturally viscous and adhesive it will coat onto any
suitably prepared surface. However what has to be born in mind is it must be coated onto a surface, not into a surface. This is the fundamental difference between Gum and Egg methodology. I have
been using a laminated polypropylene plastic paper known as Yupo for the past fifteen years. I have prints on my front room gallery wall that date from 1985 that show no loss of quality. The
paper facilitates a stain free surface, and is dimensionally stable, allowing an extremely accurate system of registration, thus in one stroke solving technical problems inherent in other processes.
Other surfaces such polyester Melamex or a heavily sized Watercolour paper.can also be imployed as long as the egg does not impregnate the surface.
Coating the Emulsion
Take sheets of laminated plastic hard board--the sort of material that’s used in kitchens to make work tops. Place your sheet of Yupo on it with masking tape applied diagonally to the corners.
Ideally this sheet of plastic should be at least twice the size of the piece of paper.
Take a four-inch acrylic foam paint roller, the sort that you can buy for use with gloss paint. Pour a
measured amount of the prepared Temperaprint emulsion onto the oval plate--say from 10ml to 30ml dependent on print size. Stir the emulsion with a small brush to ensure that it is completely smooth and homogenous.
 Then spread it out evenly over the surface of the plate. Place the roller on
the plate; charge it up until the roller has absorbed a "generous" amount of the mix. Then roll out vigorously on clean newsprint, until it reaches a conditioned state, neither too wet nor too dry--just damp. Then spread it out evenly over the surface of the plate. Place the roller on
the plate; charge it up until the roller has absorbed a "generous" amount of the mix. Then roll out vigorously on clean newsprint, until it reaches a conditioned state, neither too wet nor too dry--just damp.
Start to roll down hard onto the Yupo in all directions, then slowly lighten the pressure until you are only just supporting the handle. When you begin to coat you should be firm and apply as much pressure as needed to gain
the initial evenness and define your coating area. By the time you are coming to the end of the coating procedure, the only pressure should be the weight of the roller handle resting in your hand. Take your time. Let the
coat just relax onto the substrate. Directly the coat looks even, stop rolling. If all has gone well, you will end up with a smooth eggshell-like finish that will expose well.
Dry the coated Surface with a hairdryer
Once you have finished laying the coat you will need to dry it prior to exposure. To do this, apply a stream of warm air over the surface at the finish of the coating process. This is most conveniently
achieved using a hair dryer. When you come to this part, do not hold the hair dryer over a single spot, keep it moving. If heat is applied to a single spot you run the risk of heat fogging which,
needless to say, is something that could ruin a print. Keep the hair dryer moving at all times and at least nine inches away.
From this point forward the process conforms to the outline proceedure and normal alternative print making technique:
- Register the coated surface to the negative to be printed
- Load the registered-coated surface plus negative into a contact frame
- Expose to a light source rich in ultraviolet radiation one to three minutes in direct sunlight
- Develop/wash in a flat-bottomed tray containing water, with a dash of dish washing up liquid added. Use a plastic foam roller to develop the image--roll gently.
- Clear in 5% sodium metabisulphate or,better still, 1% sulphuric acid
- Final wash
- Dry
- Multiple print until the desired colour/ tone is achieved
CMYK printmaking notes
I use a basic two coat per colour system and perhaps three with the final black printer depending on the picture aesthetic.
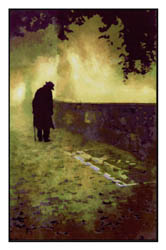 So with a normal CMYK print I use 8 or 9 coats. With a known image I can
complete a print in three to four hours. The order of printing is: So with a normal CMYK print I use 8 or 9 coats. With a known image I can
complete a print in three to four hours. The order of printing is:
- Black [mars} 1+6 one coat
- Yellow [cad lemon] 1+7 two coats
- Magenta [acra] 1+8 two coats
- Cyan [phalo blue] 1+15 one or two coats
- Complementary further 1+8 one or two coats burnt umber or emerald green
One last point: I prefer to clear the dichromate stain with a 1% solution sulphuric acid. Acid drain clear works just as well.
Happy printmaking!
|

