|
My First Gum Print
by Gary Nored
After 50 failures or so, I've finally got a decent gum print -- not perfect -- but free of major defects and I'm pretty sure I can do it again! It is amazing how finicky the
process is while being at the same time easy.
HOW I DID IT
The secret is in the sizing. And in the sensitizing. And in the drying. And in the coating. And, ....
The gelatin must be prepared and applied with great care. I used Kate Mahoney's
(from the alt-process mail list) recipe. Note the complete absence of poisonous, vaporous hardening agents.
Pour gelatin into room-temperature water very slowly, gently stirring all the while. Do not let the crystals clump up as some may not dissolve later, and the lump will leave a hole in your picture.
Allow the gelatin to "bloom" for 30 minutes or more.
Gently heat the gelatin solution to 140 degrees F. Do not let it boil, as you will never
get the bubbles out! Pour 125 ml into a small bowl, add 2 or 3 drops of Ilford film hardener to the mix and stir gently.
SIZING THE PAPER
Lay the paper on a clean, horizontal piece of glass and generously, but slowly brush the hot gelatin onto the _back side_ of the paper. Go smoothly and slowly to avoid creating bubbles in the gelatin.
Use a puddle pusher to smooth the coating. Then make a final pass with the puddle pusher under some pressure to force the gelatin into the paper.
Lift the paper off the glass, pulling it across the puddle pusher to draw all the bubbles to the bottom of the sheet.
Wipe away any puddles of gelatin from the glass. Then lay the paper, wet side down,
onto the glass and smooth it out with the puddle pusher. Apply a coat of gelatin to the front side using the same technique you used for the back. Do not touch any part of
the paper that will later contain an image -- it will cause a smudge in the final image. Peel the paper off the glass pulling it over the puddle pusher rod as before to push
any bubbles to the end of the sheet. Then hang the sheet out to dry.
The gelatin+hardener solution doesn't keep, so throw any remaining solution away.
I'm experimenting now with reusing the unhardened portion of the gelatin.
SENSITIZING THE PAPER
I never could make the formula I'd used in Austin work again, but now I'm not sure that it worked in Austin as well as I'd thought. Anyway, the "classic" formula from James' book works much better.
3cc gum, + 1cc sensitizer, +0.75-1 cm worm of black pigment makes enough sensitizer to coat one sheet of 11x15 inch Aquarelle water color paper. I put the
pigment into a round-bottom shot glass and add gum to the pigment one drop at a time, stirring with a round-ended glass swizzle stick. I'm getting very even mixing
with this technique; there is no undissolved pigment left in the shot glass and there are no pigment lumps in the sensitized coating.
I lay down a fairly thick coating of sensitizer and then gently work over the coating
with a feather-light touch to even it out. My cheap hake brush works just fine.
Dry the paper in a dark room with a fan blowing nearby -- not on the paper, but close enough to create a gentle breeze.
Too much pigment leads to staining in the highlights. But worse, it causes the emulsion to pit and flake off of the gelatin, leaving holes in the picture. For the
Windsor and Newton Lamp Black I've been using, a 1 cm worm is as much as the gum will carry. This probably changes with different pigments.
EXPOSURE
I chose a "normal" negative with a picture I wouldn't mind losing for my experiments. (I was afraid of getting undried sensitizer on the negative). The resulting image is a bit
flat, but I've come to believe that you really _must_ do multiple coatings to get the contrast and other qualities you want.
1-3 minutes direct sun (I've not gone back to recheck this since perfecting my sizing
technique).
6-10 minutes exposure to northern skylight, depending on time of day and on how long you are willing to "develop" the print. If you underexpose, the image simply falls
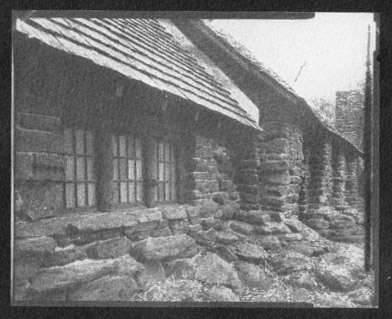
off the paper during development. When overexposed, the shadows block up (of course) and the print takes forever to develop. The attached image was made with a 6 minute exposure to northern skylight.
DEVELOPMENT
Put the print in room-temperature water and move it about to be sure that the paper is completely soaked. In the first minute the highlights will begin to slough off.
After a minute, change the water and gently place the print into the fresh water face down. Leave it alone for about 15 minutes. Repeat the 15 minute washes until the whites are cleared.
The wet image is incredibly fragile! Almost anything that touches it scratches it, or worse.
So, that's all I've learned so far. Just thought I'd share these thoughts with our little gum sub-group.
|