|
Leatherworking Tools for Making Holsters and Belts
by Ed Buffaloe
 |
|
|
Head Knife and Utility Knife
|
|
Since most of the guns I collect are old enough that holsters are no longer made for them, I decided to teach myself how to make holsters so I would have something nice to carry them in, should I desire to.
If I need to sell or trade a gun, I figure a handmade custom holster will increase its value and tradability. There isn’t a lot of information on the web about
making holsters, so I pretty much had to teach myself. I’ve spent some time studying commercial holsters and trying to understand how they are made, but otherwise I’ve just been winging it.
Two books have been particularly useful to me: Leathercraft Tools: How to Use Them, How to Sharpen Them and The Art of Hand Sewing Leather, both by Al Stohlman. Both books are available from Tandy Leather, or can be bought used on the web. Another great book for history as well as technical information is John Bianchi’s Bluesteel & Gunleather.
After reading about how superior hand sewn doublestitch is to machine sewn, I decided to do all my stitching by hand. I had actually bought a sewing machine when
I was collecting tools and equipment, but it’s black and menacing and I decided not to use it.
Basic Tools:
1. A cutting-mat big enough for the work you plan to do. I use self-healing plastic mats. I bought a big green one
because it was cheaper than the big white one, but I think the white (or translucent) ones are superior. You can find them at Amazon.com.
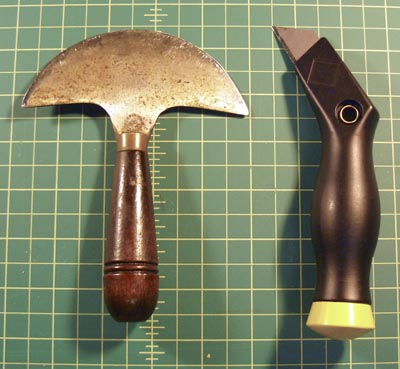
2. Knives: a head knife and a utility knife. The head knife is a specialty item, designed for cutting intricate forms from leather. They are pricy, but I bought an old Osborne on eBay for about $40 (the new one at my local Tandy Leather store was $94). The utility knife you can find almost anywhere. You will also need various sharpening stones
to keep them sharp. Your knives need to cut through leather like it was butter.
 3. A hammer or hammers.
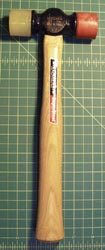
Al Stohlman says you should never strike steel tools with steel hammers. I use a utility hammer with one plastic face and one rubber one. I bought it at Home Depot, and I particularly like it because the steel head gives it weight. Various mallets and mauls are available from Tandy Leather for use with stamp tools and punches. There are also good uses for
various hammers with small metal heads, such as tack hammers, carpet hammers, and saddler’s hammers, particularly when you need to form leather. A broad-headed cobbler’s hammer can be
useful for making folds and cementing leather. Hammers used for forming leather should not be used for nails and tacks because the head needs to remain smooth so it does not mark the leather. 3. A hammer or hammers.
Al Stohlman says you should never strike steel tools with steel hammers. I use a utility hammer with one plastic face and one rubber one. I bought it at Home Depot, and I particularly like it because the steel head gives it weight. Various mallets and mauls are available from Tandy Leather for use with stamp tools and punches. There are also good uses for
various hammers with small metal heads, such as tack hammers, carpet hammers, and saddler’s hammers, particularly when you need to form leather. A broad-headed cobbler’s hammer can be
useful for making folds and cementing leather. Hammers used for forming leather should not be used for nails and tacks because the head needs to remain smooth so it does not mark the leather.
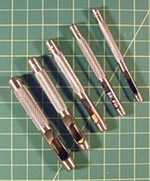 4. Hole punches. There are some cheap punches, made in China, available on eBay, but don’t buy them. You’ll wear them out in very short
order because the steel isn’t hard enough. Buy a good set from Tandy Leather. Hole punches are essential for almost any leather project. You
can buy special punches for making oblong holes, but you can do the same thing with a regular punch and a knife--it just takes longer.
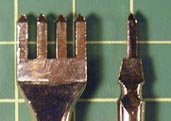 5. Thonging chisels. You need angle chisels for hand sewing (they make a diamond-shaped hole in the leather at an angle to the line you are sewing). I bought a four-prong for straight line
stitches and a single-prong for curves. There are other ways of stitching. For instance, you could use a lock stitch sewing awl, but it is much slower (at
least for me) and not as secure as double stitching. There are also a variety of awls available for making holes for stitching, but I think these little chisels are the easiest to use
for my purpose. Awls can be useful when you need to stitch odd shapes that won’t lay flat on a table. Since I first
wrote this article I have graduated from the thonging chesels to a 1/16” drill bit in a battery-powered Dremel tool--it is much faster.
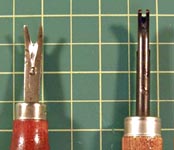 6. Edge bevelers.
These are for neatening up the edges of your leather. I mostly use a number 4 Craftool edger, but if you are going to work with thin leather you might need
the 1, 2 or 3. I also have a V-shaped edger with a number 3 on it that I like a lot--it’s perfect for bevelling the edges of thick belts. There are many different kinds of edging
tools available, including French and English edgers and Bisonette edgers. Any of them will work for making holsters and belts. Occasionally you will find them on eBay. 6. Edge bevelers.
These are for neatening up the edges of your leather. I mostly use a number 4 Craftool edger, but if you are going to work with thin leather you might need
the 1, 2 or 3. I also have a V-shaped edger with a number 3 on it that I like a lot--it’s perfect for bevelling the edges of thick belts. There are many different kinds of edging
tools available, including French and English edgers and Bisonette edgers. Any of them will work for making holsters and belts. Occasionally you will find them on eBay.
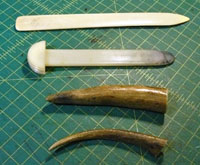 7. Bones for burnishing. I found a good bone folder on eBay, and I got a Craftool nylon folder at a
garage sale (they are available from Tandy Leather). But my most-used burnishers are two pieces of deer antler that I got from a friend who hunts regularly. These are
all-purpose tools. You can use them to burnish the edge of the leather and to enlarge and burnish holes and slots. I used to use them for wet-forming leather, but
nowadays I mostly use my fingers. Occasionally I’ll use one of the antlers if I need to put a crease in the leather.
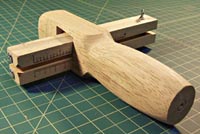 8. Strap cutter. The strap cutter is a specialty leather tool essential for making belts. If you don’t plan on making belts, you won’t need one. They look kind of
clunky, but I was very impressed by the ease with which they cut straps. All you have to do is cut one good straight edge on your piece of leather, then you can cut all
the straps you need from it in a matter of minutes. The strap cutter adjusts for both the width of the strap you wish to cut and the thickness of the leather you choose to use.
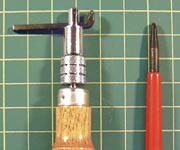 9. Gougers and groovers. The gouging tools I use have a tiny, sharp-edged hole in the end that cuts a groove in the leather. Grooves can be used for simple decoration,
but are also important for stitching. Typically, stitches are made in a groove to keep them slightly below the surface of the leather, so they are much less likely to catch on
something and come undone. The adjustable stitching groover is used to make a uniform groove along edges for stitching. The freehand groover can cut a groove anywhere on your leather..
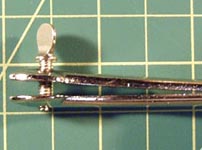
10. Creaser. Creasers are used for making lines, particularly along the edges of leather items. Sometimes these creases are used to lay stitches in; sometimes they
are used as simple decoration; and sometimes they are used as guides for more elaborate stamps and carving. You can buy creasers in standard widths for making
lines a set distance from the edge of the leather. I use an adjustable creaser so I can adjust where I want to place the line.
 11. Groover and French Edge Tool. The groover is a tool that cuts a v-shaped groove in a piece of leather. It is adjustable for
depth of cut, so it can be used for different thicknesses of leather. The v-shaped groove allows you to fold the leather more precisely. The French Edge Tool allows
you to bevel the edge of the piece of leather, so you can fit two pieces together to make a right-angle joint. These tools are rarely used for making holsters, but I use
them for my rectangular belt pouch holsters for small .25 automatics.
 |
|
|
Homemade Lacing Pony
|
|
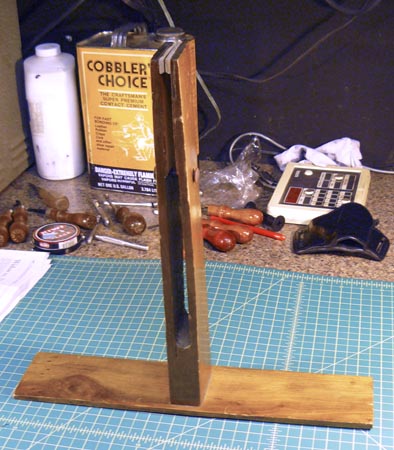
12. Lacing Pony. Pictured is a homemade pony I bought at a garage sale. The lacing pony serves as a third hand to hold your pieces of leather together
while you sew them. It’s easy to make similar items out of scrap wood and various kinds of clamps. A vise could be used in a pinch, and in fact vices for
jewelry making are perfect for small leather projects like holsters. But the pony is the traditional tool. You can also buy a free-standing stitching horse.
13. Stamps and other tools. There are a multitude of stamps, bevellers, shaders, etc. used for decoration on belts, purses, and holsters, as well as
other special tools (like a swivel knife) for cutting or impressing patterns in leather. I haven’t pursued tooling leather much, as it is time-consuming and I
have to charge a lot for it. You should take a class to learn the technique.
14. Needles and thread. The straight needles for sewing leather are blunt and don’t require the use of a thimble. You will need at least two for
doublestitching. Curved needles are useful for sewing in tight places. The ones I bought are sharp, but I ended up taking regular straight leather needles
and heating them up and bending them as needed. The thread I use appears to be about a half-millimeter in diameter, and is made of nylon waxed with beeswax.
Copyright 2007 by Ed Buffaloe. All rights reserved.
|