|
Enlarged Negatives Using APHS Ortho Film and Pyro Developer
by Bob Herbst
(This article originally appeared in the May/June 2002 issue of View Camera magazine.)
In this era of digital imaging, why on earth would anyone use traditional darkroom methods for making enlarged negatives? I prefer the hands-on approach and quicker turnaround with darkroom enlarging over
sending a digital file off to a service bureau and waiting days for the negatives to return. I can walk downstairs to my darkroom and make several enlarged negatives in five or six hours of darkroom time. Finding a service
bureau that understands the needs for making digital enlarged negatives is a challenge. I visited one of the top service bureaus in my area, met with the president, and explained that I wanted them to scan my negatives and make
halftone negatives from digital files. His response was, “We don’t scan negatives.” I tried to explain that I wanted them to use the same drum scanner they used for scanning color transparencies to scan my
negatives. He repeated, “We don’t scan negatives.” I thanked him for his time and left shaking my head. That company went out of business a year later.
Another key reason I prefer the darkroom
method is that I use pyro to develop my in-camera negatives. While the stain color can be captured in an RGB or CMYK scan of the negative, scanners use the visible spectrum and likewise, Photoshop makes adjustments to values in
the visible spectrum. As my previous research has show, the stain color of pyro has a significantly more pronounced effect for UV light than for light in the visible spectrum. Therefore, scanners and Photoshop can
not “see” the negative as the UV sensitive platinum materials do. The channel mixer feature of Photoshop can be used to compensate for this but will require considerable experimentation for your own
film/developer combination and numerous trips to the service bureau.
I use a two-step process for making enlarged negatives using traditional film and wet processing. In this process I first make a contact
interpositive and then an enlarged negative from the contact positive. I use traditional panchromatic films for the interpositive and an orthochromatic film for the final enlarged negative. The film for making the enlarged
negative is Arista Premium Halftone Supreme (APHS), a film used in the printing industry for making halftone negatives. Some people prefer to make an enlarged interpositive and then a contact negative, but this method consumes
more film as large sheets of film are used in every step.
This two-step process does take more time than using a direct reversal film such as Kodak SO-132. However, SO-132 film is limited to a maximum size of 8x10, costs
$6 per 8x10 sheet, and has a bad habit of dumping shadows and blocking up highlights. SO-132 is very convenient for teaching introductory classes in platinum/palladium printing, and I still use it for that purpose, but I use
the two-step process described here for my own work.
The Developer
The developer used in this process for both the interpositive and the enlarged negative is
Wimberly’s WD2D pyro-metol formula. I use this pyro formula for all of my in-camera negatives and in high dilutions, it acts as a soft working developer on APHS film, which is a high-contrast film by design. The
formula for the Wimberly WD2D formula is below:
Solution A
Distilled Water (at 125 deg. F) 1
liter
Metol
3 grams
Sodium Bisulfite 10
grams
Pyrogallol
30 grams
Solution B
Distilled
Water 1
liter
Sodium Carbonate (monohydrate) 40 grams
For APHS film only:
1 ml. 10% Potassium Bromide solution per liter of working solution
The developer used for the APHS film should have added to it 1ml of a 10% potassium bromide solution per liter of working solution as a restrainer and to minimize base fog. A 10% solution of potassium bromide is
made by mixing 10 grams of potassium bromide in 100ml of water (or 1 gram in 10ml of water).
I use a dilution ratio of 1:1:15 for solution A, B, and water respectively for both the interpositive and the enlarged
negative. Use distilled water - not tap water or spring water. Some photographers vary the dilution ratios or the amount of solution B to increase/decrease contrast, but I prefer to vary time and temperature for
these effects. This is purely a personal preference.
Exposing the Interpositive
The interpositive is made by contact-printing the original negative onto a piece
of film. My film of choice for the interpositive is Tri-X sheet film. Most of the original negatives I enlarge are 4x5, but Tri-X also works well for enlarging 2¼ in. negatives, as long as you are not making negatives larger
than 11x14. For sizes larger than this, I would recommend a finer-grain film such as TMAX 100. All work must be done in total darkness since you are using a panchromatic film in this step.
Put any negative in the
enlarger and raise the head so that the projected image is at least 33% larger than the area of the negative you will be contacting. Focus the negative on the baseboard and mark the height of the enlarger on the column with a
pencil, tape, etc., so you can easily return the enlarger to this position for making interpositives in the future. Remove the negative from the carrier and put it away. You want the illuminated area larger than the negative
you are contacting because you want to use the central portion of the light source, which will tend to have more even illumination than the edges. Most cold lights show some uneven illumination out at the edges of the
light circle. Next, tape a couple of pieces of mat board to your baseboard in a right angle or a frame corner to use as a guide for locating the contact frame under the enlarger in the dark. This also ensures consistency in
using the same area of the light source for making future contact interpositives. I draw a pencil mark on my baseboard where the pieces of mat board or frame corners are located so I can easily remove and re-install them in the
future.
Clean the negative with a brush and a blast of air and place it on a clean piece of glass with the emulsion side up (base side to the glass). This piece of glass should be completely cleaned and air-blasted just
prior to placing the negative on it. Turn off the lights, pull a sheet of Tri-X film from the box, blow the emulsion side free of any dust, and place it on top of the negative emulsion-side down. This will result in an
emulsion-to-emulsion sandwich. Pick up the sandwich and place it in the contact frame with the negative on top. If the contact frame does not have black backing material, place a sheet of flat black paper over the sandwich
before closing the frame. This will eliminate reflections from the backing material that can fog the film. To contact print a 2¼ in. negative, tape the negative strip to the glass about an inch from the edges of one corner of
the frame and then use the corner of the frame to locate the sheet of film. The tiniest spec of dust in making the contact interpositive will be magnified significantly when you make the enlarged negative. It will show as
a white dot on the final print, which can be spotted, but it is best to avoid these in the first place. A white dust spot is relatively easy to spot in the final print. A long and narrow fiber is very difficult to spot.
The exposure time for the interpositive will require some experimentation for your particular equipment. I have found that for my negatives, light source, and height for the enlarger head, a range of 0.5-2.0 seconds at
f/16 yields a good interpositive. I usually make three exposures one stop apart (e.g., 0.5 sec., 1.0 sec., and 2.0 sec.) and develop the interpositives together. This is a manageable range for a digital timer, but I do
not want the exposures to become too long because of the reciprocity characteristics of Tri-X. (Note that since we are actually working in the reciprocity zone of Tri-X, these exposures are not really one stop apart.) The
interpositive should be of very low contrast compared to what you are used to for making platinum or silver prints. Highlights should be full of detail, and the shadows should look gray, not extremely dark. When adjusting the
test exposures, expose for the highlights in the interpositive and develop for the shadows. The contrast range of the interpositive is perhaps the single most important aspect contributing to the success of this process. Since
APHS is a high contrast film, the interpositive must have good detail in the entire range of the image to reproduce it in the corresponding enlarged negative.
Developing the Interpositive
Presoak Bath: The presoak step is necessary to minimize uneven development. First soak the negatives in a tray with ample distilled water for three minutes prior to development.
Development:
Develop the interpositive in a tray using constant agitation. I normally develop six interpositives at one time --three different exposures of two negatives. I constantly move the bottom sheet to the top of the pile throughout
the development time. Develop for 8½ minutes at 72 degrees or 10 ½ minutes at 68 degrees using a 1:1:15 developer dilution. I have found that times any shorter than 8 ½ minutes are likely to result in uneven development, which
will be greatly amplified by the high-contrast APHS film. Be sure to rotate the stack of negatives 180 degrees in the tray half way through the development cycle to even out development. If you must reduce contrast of the
interpositive, reduce the temperature of the developer or increase the dilution rather than decreasing the time. It is also possible to slow the action of the developer by adding small amounts of a 10% potassium bromide
solution. If you notice any mottling in smooth areas of your final platinum print, the cause is most likely uneven positive development. Be very careful handling the film during the interpositive development. Any
scratches will show as dark lines in the final print.
Stop Bath: Use ample amounts of distilled water and good agitation as a stop bath rather than an acid stop. Acid stop baths tend to bleach the pyro
stain.
Fixer: Fix the film for 10 minutes in either powdered Kodak Fixer or F-24 (note: Pyro is a hardening developer, so hardening fixers are not necessary with pyro).
Post Staining: I do not recommend the
use of a post-staining step with any pyro developer for any film. The amount of stain imparted to the negative from the development stage is more than enough for producing the APHS enlarged negative for platinum printing.
A very small amount of stain will add up to two stops of density for UV light. A heavy stain will add another stop or two. The pyro stain is a major part of the success of this process, but too much of it can cause
problems. Stain is your friend. Too much stain is your enemy.
Wash: Wash the interpositives for 30 minutes, treat in Photo Flo, and hang to dry. I do not recommend the use of a hypo clearing agent, as the sodium
bisulfite creates an acidic solution, which will tend to bleach the pyro stain.
Evaluating the Interpositive
Before making the final enlarged negative, place the interpositives on a light table for a comparative evaluation. Examine the interpositives very
closely and look for scratches, uneven development, or any flaws. You want to select the interpositive that has good detail throughout the contrast range of the negative and does not look fogged. The shadows should look gray
but not black. The highlights must have detail. Use an eye loupe and compare the original negative and the interpositive side-by-side to make sure all of the information contained in the negative is in the interpositive.
Most densitometers are completely useless for measuring pyro negatives due to the stain so I cannot provide precise density ranges for a good interpositive.
Exposing the Enlarged Negative
This step is a standard enlargement process, except that you are enlarging to film instead of paper. You can work under a red 1A or equivalent
safelight since APHS is an orthochromatic film. Clean the interpositive with a negative brush and apply a good blast of air to both sides before placing it in the enlarger. You can use a standard negative carrier or tape
the negative at the corners to a piece of clean glass. I use a standard negative carrier that has been filed out to reveal the entire image. The emulsion side should be down so that the image on the easel is reversed from how
it will appear in the final print. Seal the enlarger against light leaks. Make sure a piece of flat black paper is taped to the easel and compose the image on the easel by inserting a sheet of white paper. Remove the
white paper and insert a sheet of APHS film into the easel. You may wish to use cotton gloves when handling the film. If you have had your hands in any chemicals, especially fixer, wash them with soap and dry them well. After
the film is in the easel, give it a good blast of air and start the exposure immediately. Any dust on the APHS film during exposure of the enlarged negative will show in the final print as a black spot. If dust spots do appear,
you will have to spot the negative prior to printing. If you do not do this, only etching the print can remove such a spot – a risky and difficult operation.
Make several full-frame test exposures. I
am not a fan of making test strips of only small areas of the negative, as this does not allow you to evaluate the entire image. You may have to make a couple attempts to zero in the approximate exposure range for your
equipment. I have found that at a preset enlarger height, my exposures are f/16 at 5-10 seconds for 4x5 interpositives enlarged to 8x10. I normally make three exposures one half stop apart (e.g., 5, 7.5, and 10 seconds
for each interpositive). Normally, one of the negatives from this range will yield a good enlarged negative. You can compensate for a soft interpositive by increasing the development time of the enlarged negative without having
to make a new interpositive. When making adjustments to exposures, keep in mind that the image on the enlarged negative should begin to appear at about one minute in the developer to yield a good negative.
Do not
use f-stops higher than f/16 if at all possible, as grain sharpness decreases as the f-stop increases above f/11 for most enlarging lenses. When making enlarged 8x10 negatives, I normally make two sets of three negatives from
two different image interpositives and develop all six negatives at the same time. The beginner to tray developing may wish to start with only three or four 8x10 negatives at a time.
Processing the Enlarged Negative
Process the enlarged negatives using the same process as the interpositives. The presoak bath will turn very dark as the anti-halation dye is released from the APHS film backing. I use the same
1:1:15 developer dilution and develop for 8 minutes at 68 degrees as a starting point. Note the addition of 1ml. of a 10% potassium bromide solution per liter of working solution of developer.
Fix and wash the enlarged negatives the same as with the interpositives.
Printing the Enlarged Negative
Compare the enlarged negative to the original negative on a light table. You may have to make several interpositives and negatives
until you have a negative you feel is ready to print. If you are satisfied with the negative, spot any white dots, lines, or squiggles on
the enlarged negative. Print the enlarged negative. Depending on the results, you may have to go all the way back to making a new
interpositive or you may only have to make a new enlarged negative. Continue to fine tune each step of the process until the only
adjustments required are in the printing stage (e.g., minor contrast adjustments or dodging/burning). Once you have carried the
process through from interpositive to finished print for a couple of negatives, you will have zeroed in most of the steps. Future enlarged negatives will come much faster.
 |
General Printing Observations
Learning this technique is an iterative process and requires patience. I chose to start with a couple
of negatives with which I was very familiar and had already printed numerous times.
All light sources, even the best cold lights, have some unevenness in illumination. Add to this the
optical effects of the enlarging lens. Because of these factors, printing enlarged negatives often requires more corner and edge dodging/burning than direct contact printing of in-camera negatives.
If dodging and or burning is required for the final print, I prefer to make a straight negative from the interpositive and do dodging and burning in the print making stage. In this way, if the amount of
dodging/burning needs to be adjusted, you don’t have to go back and make a new negative – a time consuming process. However, I have the advantage of using a commercial metal halide point light
source for my printing, which makes dodging and burning operations very easy. Dodging and burning can be difficult with fluorescent tube light sources because the print frame has to be very
close to the tubes. So if you are using a fluorescent tube source, dodging and burning in the enlarged negative stage may be preferable.
Enlarging a negative that has been previously printed in platinum can reveal flaws such as scratches, dust spots, or uneven development that were not nearly as apparent in a contact print
from the original negative. The reasons for this are two-fold: any flaw is magnified because the negative is being enlarged, and the high contrast nature of the APHS film will tend to enhance any
unevenness in lighting or development of the original negative.
Manipulating exposure and development at both the interpositive and enlarged-negative stages can
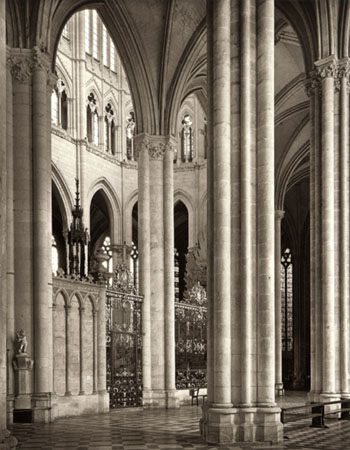
open up shadows or enhance highlights. I have been able to improve the final print from an enlarged negative over the original using these techniques.
Exercise care in handling of the interpositive and negative during development and afterward. A scratch on the original negative or on the enlarged negative will show as a white line in the final
print. A scratch on the interpositive will show as a dark line on the final print.
Do not try to go larger than 8x10 until you are comfortable with all stages of the process. Learning
this process is easier if you already use pyro for your in-camera negatives because you will already be experienced in judging a pyro negative for platinum printing. It helps to have a light
table to compare the original negatives, enlarged negatives, and interpositives side by side. Keep detailed notes of exposure and development information and label each and every interpositive
and enlarged negative so you can compare them with your notes. You may think this is not necessary, but I will guarantee you that after you have made a dozen or so interpositives and
enlarged negatives, you won’t remember what you did on which. They will all blend together.
This process requires a lot of time in the darkroom during the learning process. But after I saw
8x10 or larger platinum prints of images that I had previously only printed as 4x5s, all I could say was, “WOW!” It is worth the effort and allows you to make platinum prints up to 20x24 of images
originally shot in smaller formats.
Some Important Notes on Equipment and Facilities
A few words are required regarding equipment and darkroom facilities for making enlarged
negatives. All enlargers leak light, and since you will be working with film, the light leaks must be sealed up. Use strips of black gaffer’s tape along the edges of the negative carrier and enlarger
negative stage after the carrier is placed in the enlarger. Also place tape over any gaps between the light head and the enlarger frame. You may want to consider painting the walls immediately
around your enlarger flat black. A digital timer on your enlarger will improve accuracy and repeatability of your exposures. I use an Aristo cold light with a Zone VI stabilizer on my enlarger
to keep light output constant. I recommend a 150mm lens for enlarging 4x5 negatives rather than a 135mm lens, which tends to have illumination fall-off in the corners of the image.
The easel used for making the enlarged negatives must have a flat black surface. You can either paint it, or tape a piece of flat black paper to it. Do not use rubylith on the easel with the belief that
since it is red, it will not contribute to fog in an ortho film. The glossy surface of the rubylith will reflect enough light through the back of the APHS film that it will fog the shadows in the enlarged
negative. This may not be apparent to the eye until you compare a negative made with rubylith on the easel to one made with a flat black piece of paper on the easel using the same exposure and development.
APHS Film Source
APHS film is available in sizes up to 20x24 inches from Freestyle Photographic Supplies in
California (www.freestylecamera.com). It is very important that you explicitly specify that you want the APHS film manufactured in Japan. Freestyle has two suppliers for APHS, and if you do
not specify this to the person taking the order, you will likely get the film manufactured in the U.S. The Japanese film has a much higher silver saturation than the U.S. film. The U.S. manufactured
film will not will not work as well for enlarged negatives for continuous tone processes such as platinum/palladium printing.
|
Bob Herbst has been photographing and printing in platinum and silver gelatin for more than 32 years. He has gained international recognition as a master platinum printer, and his work is
represented in collections in the U.S. and Europe. Bob’s work spans landscape and architectural subjects, and he works primarily with large-format view cameras. His platinum work has
been displayed in numerous solo exhibitions and juried exhibitions. Bob teaches workshops on platinum/palladium printing and has taught undergraduate and continuing education classes at the
University of Akron, the Cleveland Institute of Art, and Hiram College in Ohio. A selection of his work and information on his workshops can be viewed at www.bobherbst.com. He can be
reached via email at bobherbst@adelphia.net, by phone at (330) 562-4854, or by mail at 619 Deepwood Drive, Aurora, Ohio, 44202.
|
|
|
This article is copyright 2002 by Bob Herbst. All rights reserved.
No part of this article may be reproduced in any form without the express consent of the author.
|


